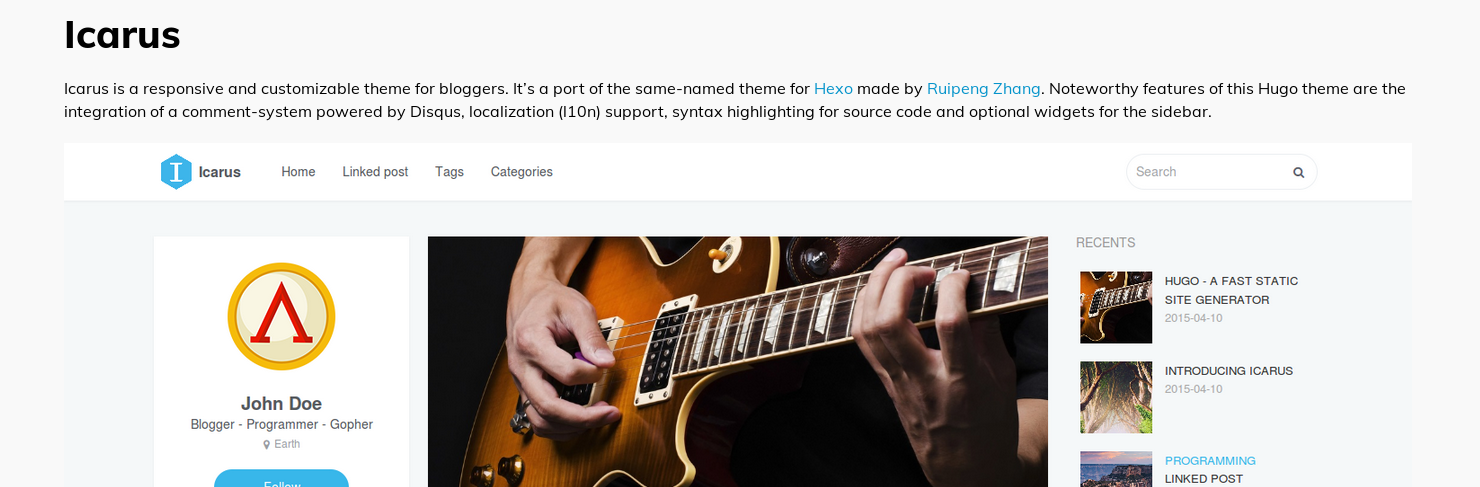
Saturday, May 4, 2013

Fedora 18 Remix for Genesi EFIKA MX Smartbook available

After quite some delay, I have been able to try out a work-in-progress kernel-tree (3.7) from Sascha Hauer for the Genesi EFIKA MX Smartbook. The Fedora Remix image I have created uses the barebox bootloader to load the device-tree and the kernel (a zImage with concatenated initramfs).

The contents of the image is based on the Fedora 18 Generic Root Filesystem armhfp. XFCE and most of the desktop basics are included. Very little changes were needed over all. As the Smartbook has only 512MB of RAM, it is recommended to add some swap space, re-using the swap on the internal HD works for me (you need to update your /etc/fstab).

The current kernel configuration as found in Sascha's tree does not play very nice with the Fedora rootfs. When exercising some load, quite some oopses occur and it often results in a kernel panic (this happens because some 'sh' process reads /proc/meminfo, no idea what process, or why). I have been able to re-configure the kernel to the Fedora specifics, while keeping to the options from Sascha's defconfig. This kernel looks more stable, and a 'yum update' over the integrated Wifi adapter has finished successfully. So, if you have tried an earlier (not publicly announced) image, it would be in your benefit to update to this new release.

A difficulty with using this image, is that you need to configure your Smartbook to boot from SD-card, not the internal SPI-NOR. This change is done by flipping three dip-switches that are located under the keyboard, next to the flat-cable that connects the keyboard. The Genesi site contains a very good explanation on removing the keyboard so that you can access the switches.

The standard and default configuration of these switches cause the system to use the bootloader (uboot) to boot from the internal SPI-NOR and look like this:

 +---------+
 | X       |
 |   X X X |
 +---------+
Change this to the following to boot with barebox from the SD-card:
 +---------+
 |     X X |
 | X X     |
 +---------+

For now, I was only successful with booting from the left SD-card slot. barebox should also support booting from the micro-SD-card slot that is accessible by removing the battery. You will need to modify the barebox configuration (adding variables/scripts) for this. A future release of this remix will hopefully come with a modified barebox configuration so that both card slots work (and also separating zImage from the initramdisk).

These instructions and a link for downloading are captured in the Fedora Wiki and anyone is free to improve, correct and amend that page.

Sunday, April 7, 2013

Configuring a bluetooth keyboard system-wide from the command line

Recently I bought a new keyboard, which I intend to use when my laptop is placed in its docking station. There are two external monitors connected, making the display of the laptop rather useless (only two outputs are supported at the same time). In normal circumstances the laptop lid will be closed, so the keyboard is not accessible.

My new keyboard is a Logitech K760 and is connected through bluetooth. Pairing with help from the the XFCE/GNOME tools is easy enough, but this causes the keyboard to be available after login only. That is not very practical. After boot, I have to login through GDM and prefer to not need to use the keyboard of the laptop itself. For this, I needed to figure out how to make the bluetooth keyboard available on system level, and not per user. Descriptions on how to do this seem to be very sparse, and mostly depend on other distributions than RHEL or Fedora. I prefer to use standard tools as much as possible, adding custom scripts for these things makes it more difficult to move configurations between systems. Furthermore the keyboard can be paired to multiple (3) systems at the same time, the F1-3 keys can be used to select a system, similar to a KVM switch.

The most minimal and easy to use tools I could find, are included in the test suite of the BlueZ package. Unfortunately, these are not packaged for all I know, so installing or using these scripts is impractical. But, as these scripts are only needed for pairing once, I think they are a nice solution anyway. The advantage over other options, is that the scripts are updated with the bluez software itself, which causes the same scripts (well, different versions) to work regardless of changes to the bluez API.

Getting the scripts from the bluez test-suite that matches the available version in Fedora or RHEL, can be done with yumdownloader from the yum-utils package (all as normal unprivileged user):

$ yumdownloader --source bluez

Extract the source RPM by installing it:

$ rpm -ivh bluez-4.66-1.el6.src.rpm

Extract the sources which include the test-suite:

$ rpmbuild --nodeps -bp ~/rpmbuild/SPECS/bluez.spec
Note that the --nodeps parameter is used. The -bp argument causes all BuildRequires dependencies to be checked, most of them are not needed for the test-suite scripts.

After extracting the sources successfully, the test-suite is located under the BUILD directory:

$ cd ~/rpmbuild/BUILD/bluez-4.66/test/

Everything is now ready for pairing, so put the keyboard in discovery mode and scan for it:

$ sudo hcitool scan
Scanning ...
 00:1F:20:3C:A2:03 Logitech K760

The keyboard will need ao authenthicate to the system. simple-agent can be used for that, like this:

$ sudo ./simple-agent hci0 00:1F:20:3C:A2:03
DisplayPasskey (/org/bluez/2117/hci0/dev_00_1F_20_3C_A2_03, 716635)
Release
New device (/org/bluez/2117/hci0/dev_00_1F_20_3C_A2_03)
The simple-agent script will wait for a response of the keyboard, press the PIN that is shown (here 716635) and hit enter.

Obviously the keyboard is a device that supports the input-class. Hence test-input can be used to setup the connection:

$ sudo ./test-input connect 00:1F:20:3C:A2:03

If this worked without error message, mark the keyboard as a trusted device. This will make it possible for the keyboard to connect to the system without requesting for approval:

$ sudo ./test-device trusted 00:1F:20:3C:A2:03 yes

After these steps, verify that the keyboard connects automatically after a reboot. This worked for me on my RHEL-6 laptop, and a cubieboard installed with Fedora 18 ARM.

Sunday, March 17, 2013

Use dnsmasq for separating DNS queries

Automatic network configuration with DHCP is great. But if you need to use multiple separated networks at once, it gets more difficult pretty quickly. For example, my RHEL-6 laptop

  1. connects through wifi to the network at home, which provides internet access
  2. accesses remote systems connected via a VPN
  3. and manages virtual machines that need access to any of those

Now, when NetworkManager connects to the VPN, the DNS-servers for the VPN are added to /etc/resolv.conf with a higher priority than the home network one. This is fine in a lot of circumstances, but that means all domain name
service lookups will go through the VPN first. That's not optimal, and the administrator of the VPN does not need to see all the hostname lookups my laptop is doing either. Also, any lookups for the local network will go through
the VPN, fail there and are retried with the next DNS-server, making queries for the LAN slower than all the others.

The solution sounds simple: Only use the DNS-servers on the VPN for lookups for resources that are on the VPN.

Unfortunately, the configuration is not that simple if it needs to work dynamically. The main configuration file that contains DNS-servers (/etc/resolv.conf) does not have any options to tell that some DNS-servers are to be used for certain domains only. A workaround for this limitation is to use a DNS-server that supports filtering and relaying queries, and have it listen on localhost. This DNS-server is configured in /etc/resolv.conf, and any new network configurations (or removed ones) should not change the configuration in /etc/resolv.conf, but the local DNS-server instead.

This means that my /etc/resolv.conf looks like this:
nameserver 127.0.0.1
search lan.example.net

The minimal /etc/resolv.conf file is also saved as
/etc/resolv.conf.dnsmasq, which is used as a template for restoring the configuration when a VPN service (like OpenVPN) modified it.

The DNS-server for this setup became dnsmasq. This piece of software was already installed on my laptop as a dependency of libvirt, and offers the simple configuration that this setup can benefit from. For this setup, the
libvirt configuration of dnsmasq is not touched, it works fine and with its integrated DHCP-server I am not tempted to break my virtual machines (not now, and not when I install updates).

The configuration to let dnsmasq listen on localhost, and not intervene with libvirt that listens on virbr0 is very minimal as well. My preference is to prevent big changes in packaged configuration files as these may become difficult to merge with updates, so the only change in /etc/dnsmasq.conf that is required is this (newer versions seem to have this by default):
# Include a another lot of configuration options.
#conf-file=/etc/dnsmasq.more.conf
conf-dir=/etc/dnsmasq.d

An additional file in the /etc/dnsmasq.d directory suffices,  /etc/dnsmasq.d/localhost.conf:
no-resolv
no-poll
interface=lo
no-dhcp-interface=lo
bind-interfaces

The default configuration file /etc/dnsmasq.conf contains a good description of these options. It is not needed to repeat them here.

Enabling dnsmasq to start at boot is a prerequisite, otherwise any lookup that uses DNS-servers will fail completely. On my RHEL-6 system, I needed to enable starting of dnsmasq with /sbin/chkconfig dnsmasq on, start
the service with /sbin/service dnsmasq start.

With this current configuration, only hostnames and IP-addresses that are in /etc/hosts are being resolved. Which means, it is difficult to create any network connections outside of the laptop. The next step is to integrate the available connected networks with the dnsmasq configuration.

NetworkManager is used to configure the network on my laptop. This is convenient as it supports WLAN and can connect to the VPN. In order to teach it to write a dnsmasq configuration file for each network that gets setup, I used
an event script, /etc/NetworkManager/dispatcher.d/90-update-resolv.conf:
#!/bin/sh
#
# NetworkManager dispatcher script to prevent messing with DNS servers in the
# LAN.
#
# Author: Niels de Vos 
#

DNSMASQ_RESOLV=/etc/dnsmasq.d/resolv-${CONNECTION_UUID}.conf

function write_dnsmasq_header
{
 if [ ! -e ${DNSMASQ_RESOLV} ]
 then
  echo "# ${DNSMASQ_RESOLV} generated on $(date)" > ${DNSMASQ_RESOLV}
  echo "# Generator: ${0}" >> ${DNSMASQ_RESOLV}
  echo "# Connection: ${CONNECTION_UUID}" >> ${DNSMASQ_RESOLV}
 fi
}

function create_dnsmasq_config_env
{
 local NS

 write_dnsmasq_header

 for NS in ${IP4_NAMESERVERS}
 do
  echo "server=${NS}" >> ${DNSMASQ_RESOLV}
 done
}

function create_dnsmasq_config_from_resolv_conf
{
 local NS
 local DOMAIN=""

 write_dnsmasq_header

 DOMAIN=$(awk '/^domain/ {print $2}' /etc/resolv.conf)
 [ -n "${DOMAIN}" ] && DOMAIN="/${DOMAIN}/"

 for NS in $(awk '/^nameserver/ {print $2}' /etc/resolv.conf)
 do
  # make sure the NS is not from an other config
  grep -q "[=/]${NS}\$" /etc/dnsmasq.d/resolv-*.conf && continue

  echo "server=${DOMAIN}${NS}" >> ${DNSMASQ_RESOLV}
 done
}

function remove_dnsmasq_config
{
 rm -f ${DNSMASQ_RESOLV}
}

function remove_stale_configs
{
 local CONF
 local UUID

 for CONF in /etc/dnsmasq.d/resolv-*.conf
 do
  # in case of a wildcard error
  [ -e "${CONF}" ] || continue

  UUID=$(awk '/^# Connection: / {print $3}' ${CONF})
  if ! ( nmcli -t -f UUID con status | grep -q "^${UUID}\$" )
  then
   rm -f ${CONF}
  fi
 done
}

function reload_dnsmasq
{
 cat /etc/resolv.conf.dnsmasq > /etc/resolv.conf
 [ -n "${DHCP4_DOMAIN_SEARCH}" ] && echo "search ${DHCP4_DOMAIN_SEARCH}" >> /etc/resolv.conf
 # "killall -HUP dnsmasq" is not sufficient for new files
 /sbin/service dnsmasq restart 2>&1 > /dev/null
}

case "$2" in
 "up")
  remove_stale_configs
  create_dnsmasq_config_env
  reload_dnsmasq
  ;;
 "vpn-up")
  remove_stale_configs
  create_dnsmasq_config_from_resolv_conf
  reload_dnsmasq
  ;;
 "down")
  remove_stale_configs
  remove_dnsmasq_config
  reload_dnsmasq
  ;;
 "vpn-down")
  remove_stale_configs
  remove_dnsmasq_config
  reload_dnsmasq
  ;;
esac

This script will write a configuration file like /etc/dnsmasq.d/resolv-0263cda6-edbd-437e-8d36-efb86dcc9112.conf:
# /etc/dnsmasq.d/resolv-0263cda6-edbd-437e-8d36-efb86dcc9112.conf generated on Sun Mar 17 11:57:26 CET 2013
# Generator: /etc/NetworkManager/dispatcher.d/90-update-resolv.conf
# Connection: 0263cda6-edbd-437e-8d36-efb86dcc9112
server=192.168.0.1

The generated configuration file for dnsmasq simply states that there is a DNS-server on 192.168.0.1, which can be used for any query. When the configuration has been written, the dnsmasq daemon is sent a SIGHUP which causes it to reload its configuraion files.

After connecting to a VPN, an other partial configuration file is generated. In this case /etc/dnsmasq.d/resolv-ba76186a-9923-4756-aa8a-19706a4d273c.conf:
# /etc/dnsmasq.d/resolv-ba76186a-9923-4756-aa8a-19706a4d273c.conf generated on Sun Mar 17 11:57:41 CET 2013
# Generator: /etc/NetworkManager/dispatcher.d/90-update-resolv.conf
# Connection: ba76186a-9923-4756-aa8a-19706a4d273c
server=/example.com/10.0.0.1
server=/example.com/10.0.0.2

Similar to the main WLAN connection, this configuration contains two DNS-servers, but these are to be used for the example.com network only.

For me this works in the environments I visit, wifi at home, network cable connected docking station, and several other (non-)public wireless networks.

Wednesday, January 23, 2013

Changing vim settings depending on the git repository containing the file

Not all projects I am regularly working on use the same CodingStyle. This is very unfortunate, and sometimes makes it time consuming to provide acceptable patches. One common example is that some project indent with a <tab>, where others expect <4-spaces>.

I could not find a vim plugin or other extension that lets me pick vim-settings per git repository. The idea that I came up with, is to set the project specific vim-settings in the git-config itself. For example:

$ git config --add vim.settings 'tabstop=4 expandtab'

Now, in my ~/.vimrc, I have the following snippet:

let git_settings = system("git config --get vim.settings")
if strlen(git_settings)
    exe "set" git_settings
endif

Editing a file in the git repository that contains the above vim.settings, now replaces my <tab> by <4-spaces>. Other repositories that do not have the vim.settings will fall-back to my vim defaults. If you can think of any improvements or suggestions, please share them.

Thursday, July 26, 2012

Wireshark 1.8.x included in the upcoming Fedora 18

It seems that the maintainer of the wireshark package in Fedora has updated to version 1.8.1 in the current Fedora Rawhide, which will become Fedora 18. The schedule tells us that Fedora 18 is planned to be released on 2012-11-06 (the latest schedule may have an updated date).

This is good news for the Gluster Community (and support engineers like me), as Wireshark 1.8 contains support for most of the Gluster protocols:
Comments on the support in Wireshark are much appreciated, send them to gluster-devel@nongnu.org, file an issue in my development repository or in the Wireshark Bugzilla.

Sunday, May 27, 2012

Gluster support for Wireshark is maturing!

A lot of changes were committed recently to the gluster-wireshark repository. A lot of effort was put into the details (click on the image to enlarge):

  • UUIDs and GFIDs are now displayed as 4-2-2-2-6 bytes
  • flags for OPEN, CREATE etc are now shown in detail
  • mode/umask permissions are now shown in detail
  • dictionaries are displayed more user friendly
Most of the work was done so that the dissector files get in shape for (requesting) inclusion in upstream.

The full log is available, and so are updated RPMs for Fedora-16, Fedora-17 and EPEL-6. If installing a patched Wireshark isn't an option, you can build a wireshark-plugin-gluster easily with the steps in the provided README. On the project wiki, there are some pre-captured tcpdumps for consumption. Only a hand full of minor issues are know at this time, more reviewing and reporting is definitely welcome!

If you notice that some packets/frames are not displayed as Gluster, and you think they should, check gluster-wireshark wiki where is explained how to prevent PCEP and other protocols from claiming packers/frames.

Thursday, May 17, 2012

Updated Wireshark packages for RHEL-6 and Fedora-17 available for testing

[From an email to the gluster-devel mailinglist] 
 
today I have merged support for GlusterFS 3.2 and 3.3 into one Wireshark 
'dissector'. The packages with date 20120516 in the version support both 
the current stable 3.2.x version, and the latest 3.3.0qa41. Older 3.3.0 
versions will likely have issues due to some changes in the RPC-AUTH 
protocol used. Updating to the latest qa41 release (or newer) is 
recommended anyway. I do not expect that we'll add support for earlier 
3.3.0 releases.

My repository with packages for RHEL-6 and Fedora-17 contains a .repo 
file for yum (save it in /etc/yum.repos.d):
- http://repos.fedorapeople.org/repos/devos/wireshark-gluster/

RPMs for other Fedora or RHEL versions can be provided on request. Let 
me know if you need an other version (or architecture).

Single patches for some different Wireshark versions are available from 
https://github.com/nixpanic/gluster-wireshark.

A full history of commits can be found here:
- https://github.com/nixpanic/gluster-wireshark-1.4/commits/master/
   (Support for GlusterFS 3.3 was added by Akhila and Shree, thanks!)

Please test and report success and problems, file a issues on github: 
https://github.com/nixpanic/gluster-wireshark-1.4/issues
Some functionality is still missing, but with the current status, it 
should be good for most analysing already. With more issues filed, it 
makes it easier to track what items are important.

Of course, you can also respond to this email and give feedback :-)

After some more cleanup of the code, this dissector will be passed on 
for review and inclusion in the upstream Wireshark project. Some more 
testing results is therefore much appreciated.